![]() Some more guidance regarding getting Obsidian set up.
Some more guidance regarding getting Obsidian set up.
Using simple templates
A ‘template’ is just a note file that you insert into a new note to provide you with guidance. In the course handbook vault, these are in the _simple_templates folder. Try it out:
Hit ctrl+n or cmd+n to make a new note.
Hit ctrl+p or cmd+p to open the command pallete; search ‘templates: insert template’.
Select the template you want to use. Boom! Consistent headings and metadata and hints all laid out for you.
Remember to look for links.
Use the back links and outgoing links pane (arrow on the right hand side of the interface) to see what and how a note links out. If you don’t see this pane, go to settings, core plugins, and turn on ‘backlinks’ and ‘outgoing links’. See also my slides from sept 14.
Configuring Your Obsidian Vault
If you downloaded the Course Handbook Vault, unzipped it (Windows users: right-click, select ‘extract all’; double clicking to peak inside is not the right option!), you might be interested in using some of the ‘extras’ I configured.
However, it might be that those extras did not get installed properly (due to security settings etc). You can check to see if they installed when you first opened this vault by clicking on the ‘settings’, then ‘community plugins’, then scrolling down to see what plugins are installed:
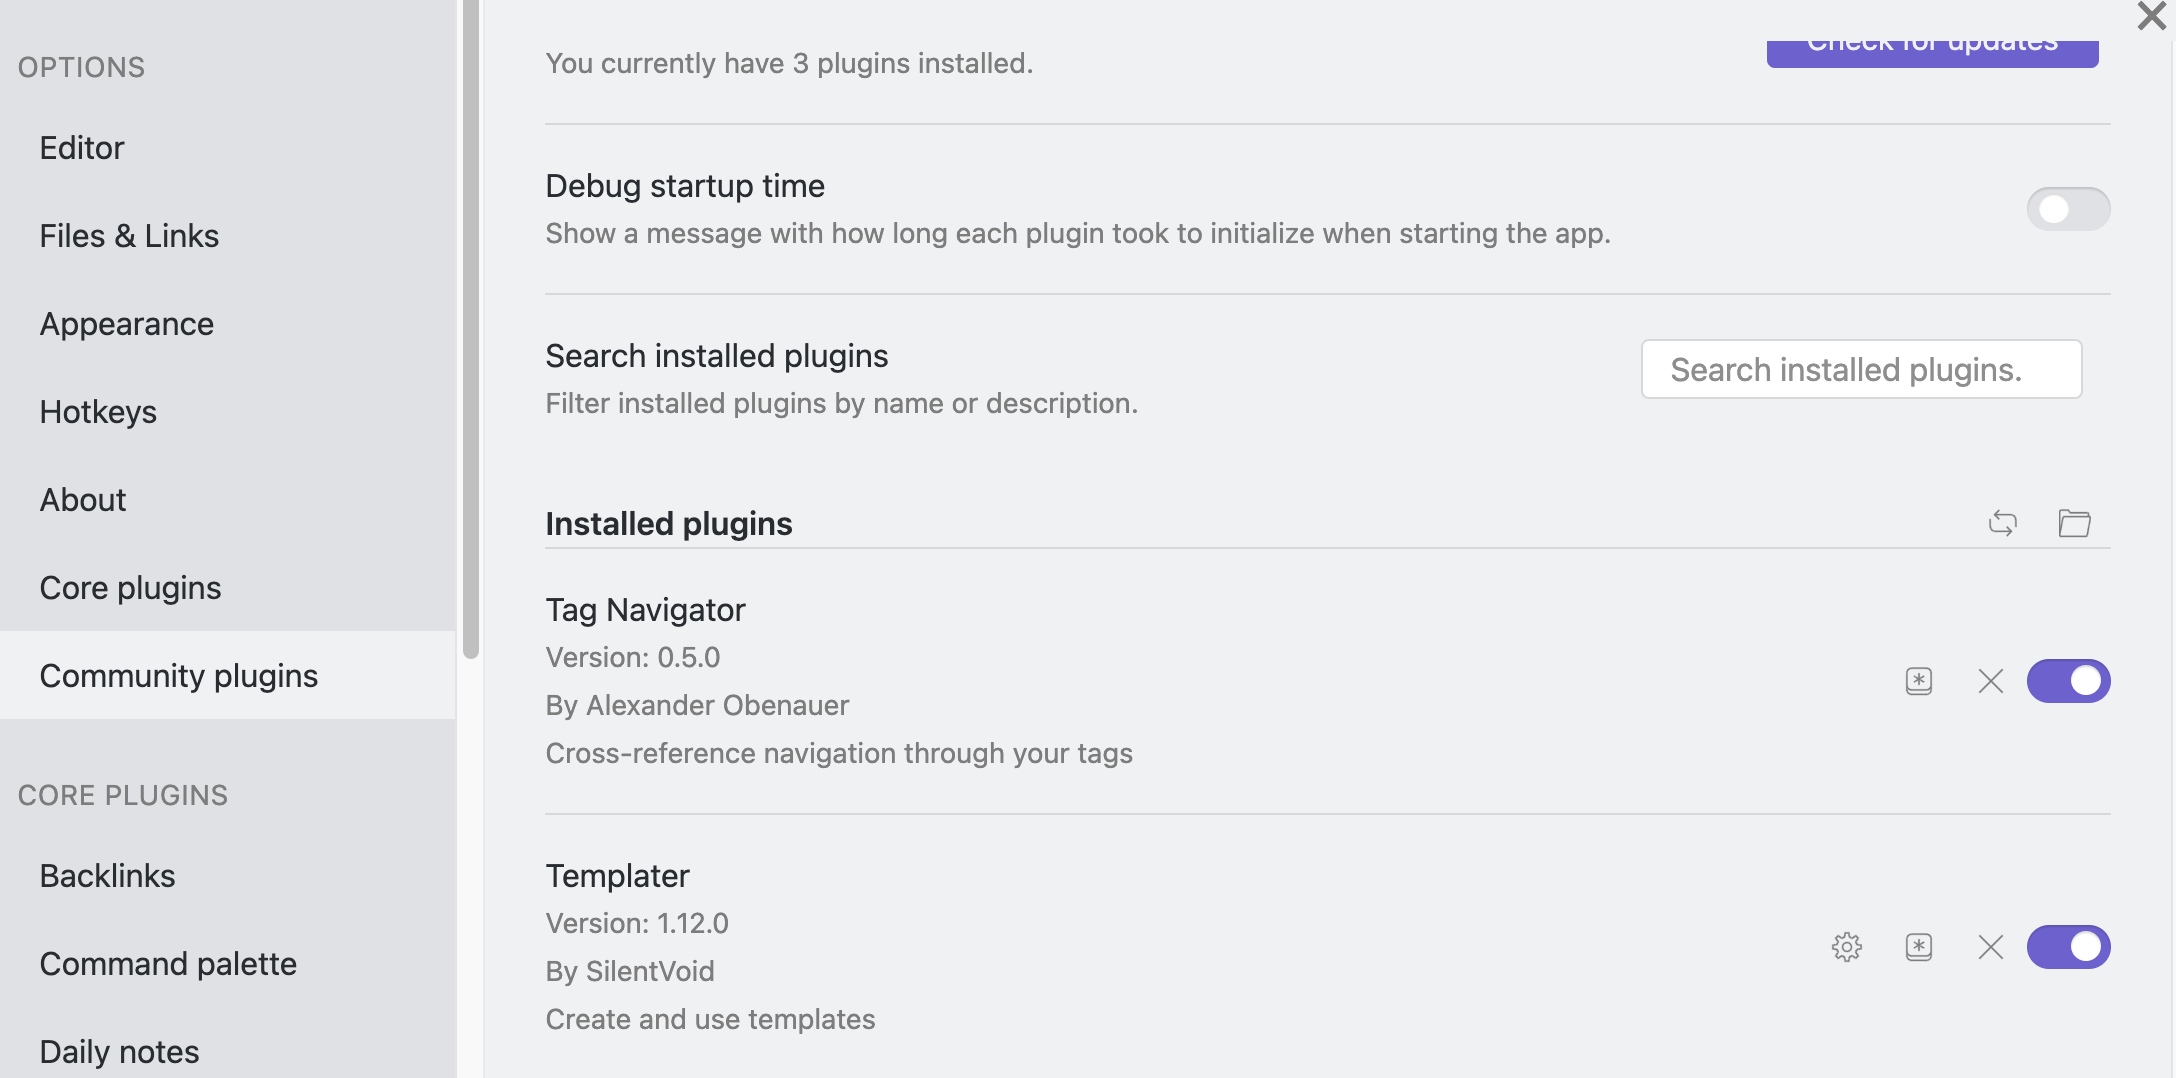
You should see: Templater; Zotero Integration; Tag Navigator. No worries if you don’t. Here’s what you do to get them going.
- Templater
- On the settings > community plugins, hit the ‘browse’ button. In the search box, type in
templater - Hit the ‘install button’
- Hit the enable button
- Hit the ‘options’ button to configure its settings
- the only one you’ll modify is
Template folder location- type in_complex_templates
- the only one you’ll modify is
- On the settings > community plugins, hit the ‘browse’ button. In the search box, type in
Now, hit the ‘x’ button to close the dialogue. Let’s test it out. Hit ctrl+p or cmd+p to bring up the command palette. Type ‘templater’ and select:

It will look in your _complex-templates folder, and see that you’ve got two options; select hypothesis

The first time you run it, it will ask you for your Hypothesis developer key.

Log into Hypothesis in your web browser, go to your ‘settings’ and select ‘developer’. Copy the key, paste it in. The box will change:
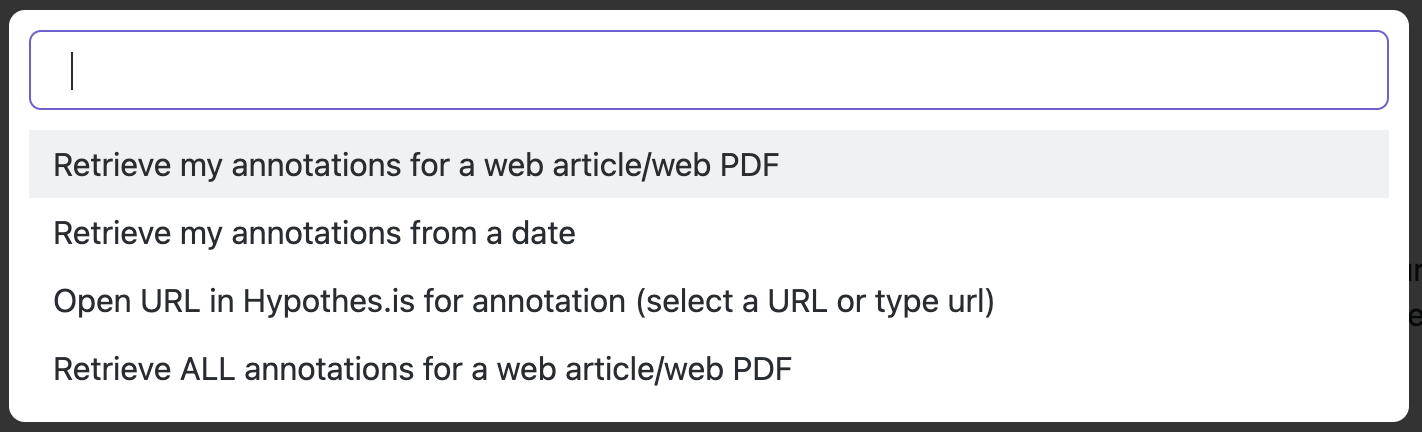
…and every time you run the hypothesis command again, you’ll jump to this box. Select what you want to do; it will ask you for the URL etc.
- Zotero Integration
This depends on you having Zotero installed on your machine, and the Better Bibtext Plugin for zotero (which makes it easier to work with plain text files as we find here in Obsidian and Zotero). Once you have those two things installed and set up, in Obsidian:
-
On the settings > community plugins, hit ‘browse’ and then look for ‘Zotero Integration’. Nb., there are a couple of plugins to work with Zotero; you want
Zotero Integration. Install and enable the plugin, then go to its options page. -
Under ‘General Settings’, press the button for ‘PDF Utility.’
-
Make sure ‘Database’ says ‘Zotero’
-
Make sure ‘Note Import Location’ says ‘zotero-notes’ (this is a folder I made within the vault to sort these annotations into.)
-
Make sure ‘Enable Cite Key Autocomplete’ is turned on.
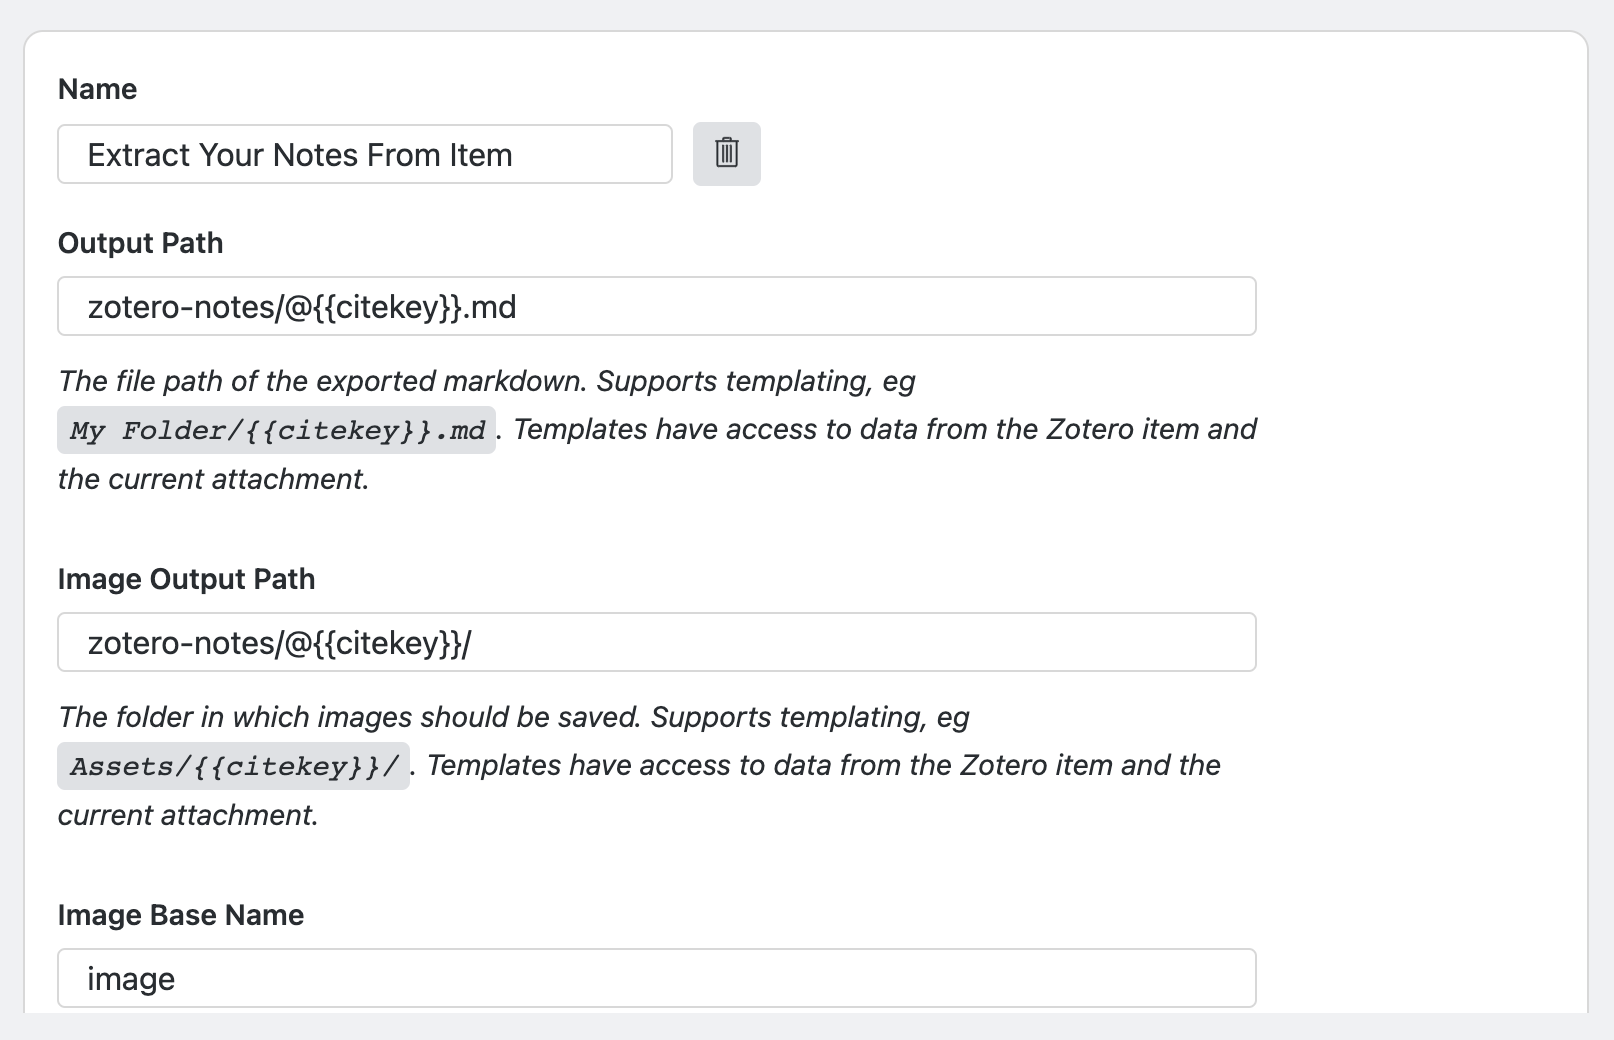
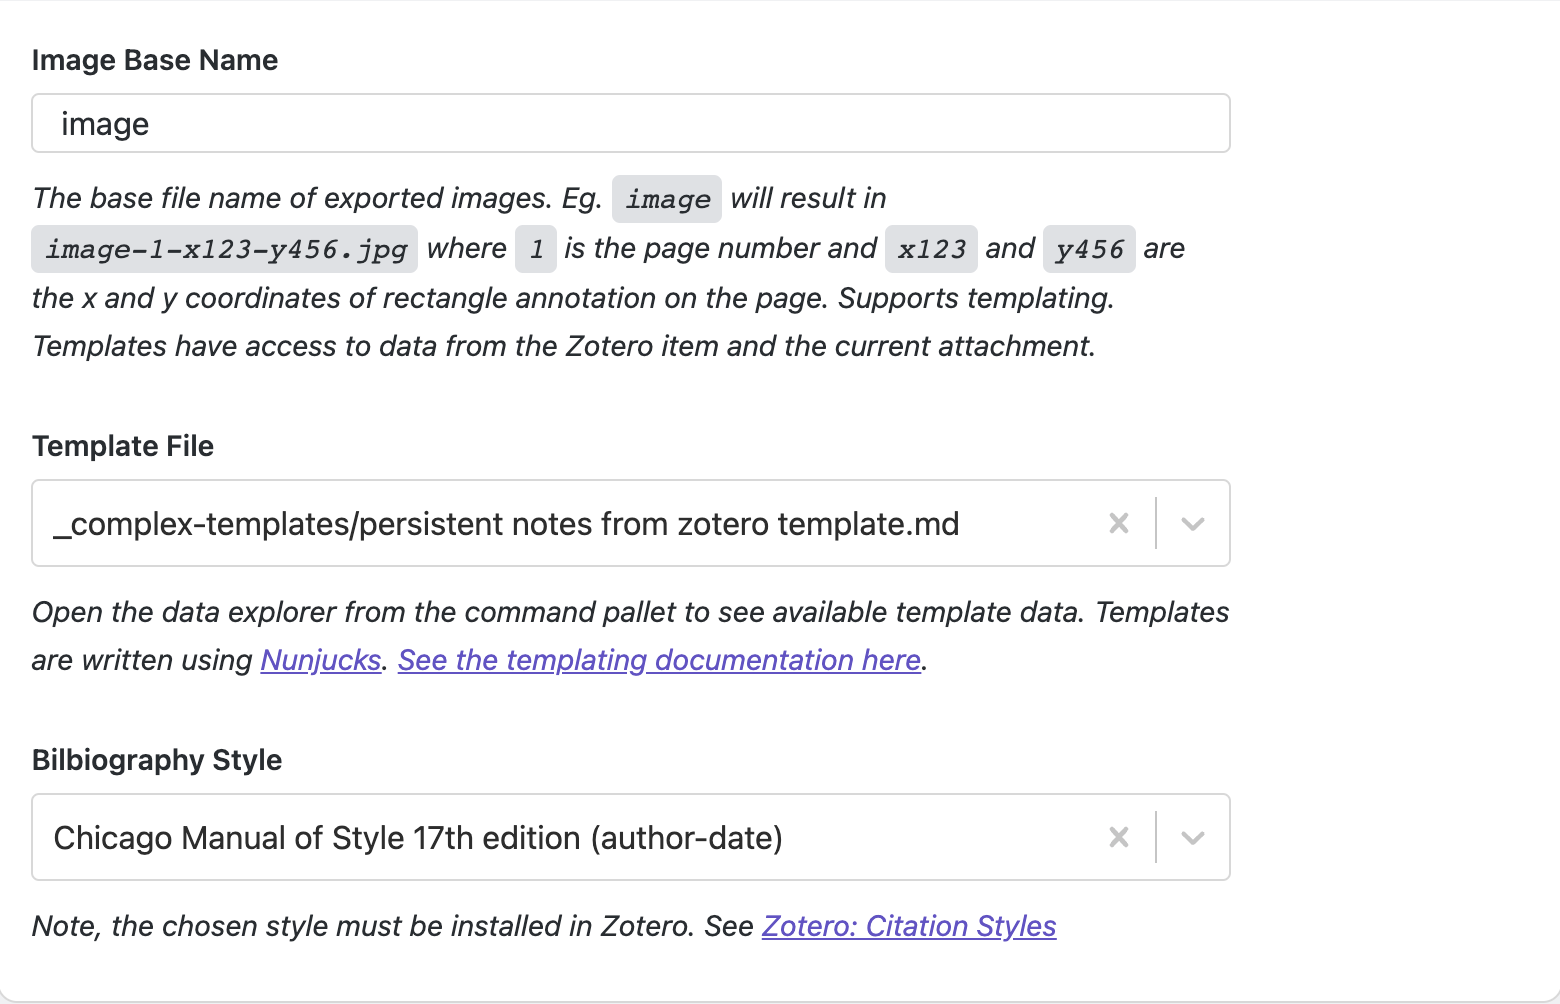
Under ‘Import Formats’ have everything set up like this:
Now test it out. Hit ctrl+p or cmd+p to bring up the command palette.
Look for ‘zotero - extract your notes from an item’.
Wait a few moments for the zotero selector to appear.
Search for and select the item that you were annotating within zotero
A new note will appear in the zotero-notes folder in obsidian. Ta da!
- Tag Navigator Repository
This one is not available through the community plugin browser. It’s not really mission critical, but if it’s installed, it does make a nicely laid out table of your tags, which if you’ve been using the #tag/subtag arrangement, is handy. If you go to the repository, it has instructions there on how to lay it all out.

